Objective
Log in to your server via SSH with root privileges in order to gain full control over server configuration, management, and software installation.
Environment
To connect to a server via SSH, you will need:
- A computer running Windows, macOS, or Linux.
- An SSH client:
• Windows: built-in SSH support in PowerShell or
• Windows Terminal (available in Windows 10 and later), or PuTTY (can be downloaded for free from the developer’s website: putty.org).
• macOS and Linux: a terminal with support for the ssh command (included by default).
Prerequisites
Before you begin, make sure that:
-
Your computer has an active internet connection.
-
You know the IP address of your server (provided by your hosting provider).
-
You know the username (usually root) and password for your server (provided by your hosting provider).
Procedure
Method 1. Using Terminal or PowerShell
- Open PowerShell (Windows) or Terminal (Windows, macOS, or Linux).
- Enter the following command:
ssh root@ХХХ.ХХХ.XXX.XXX
Replace XXX.XXX.XXX.XXX with your server’s IP address, then press Enter. - If you see a security prompt asking whether you want to continue connecting, type:
yes
and press Enter. - When prompted, enter your server password and press Enter:
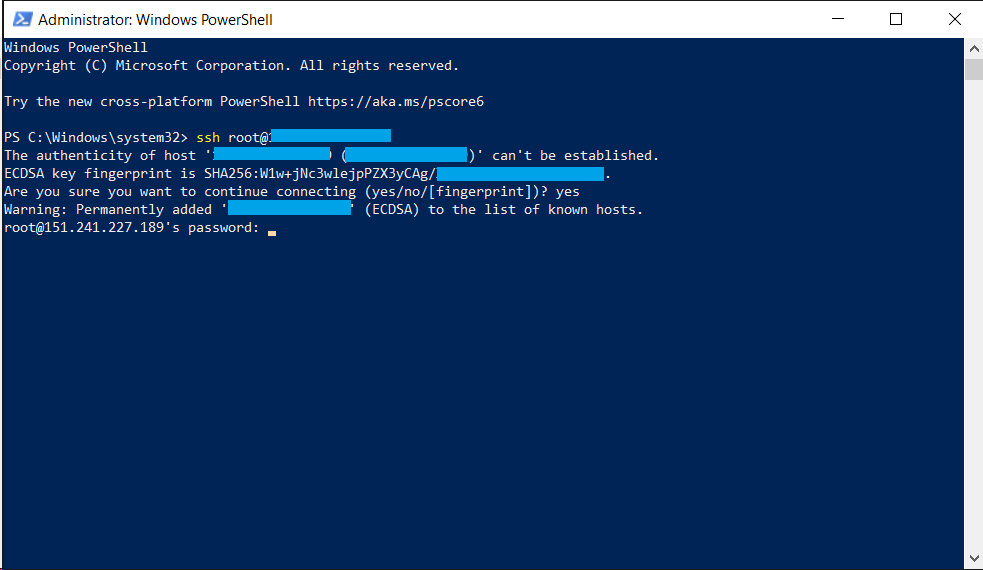
Note: While typing the password, no characters (such as asterisks) will be displayed. This is normal behavior.
Method 2. Using PuTTY
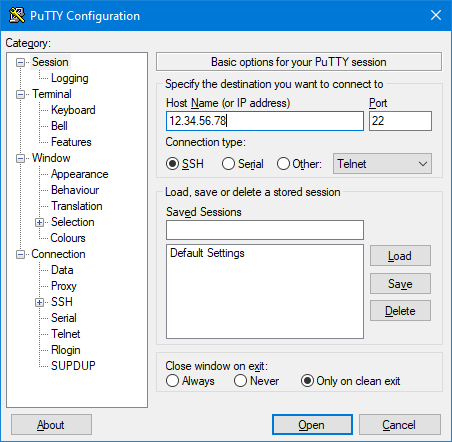
- Launch PuTTY.
- In the Host Name (or IP address) field, enter your server’s IP address.
- Make sure the Port field is set to 22, then click Open:
- When the terminal window appears, enter the username:
root
and press Enter. - Enter your server password and press Enter.
Note: While typing the password, no characters will be shown.
Done!
If the credentials are correct, you will be successfully logged in to the server:
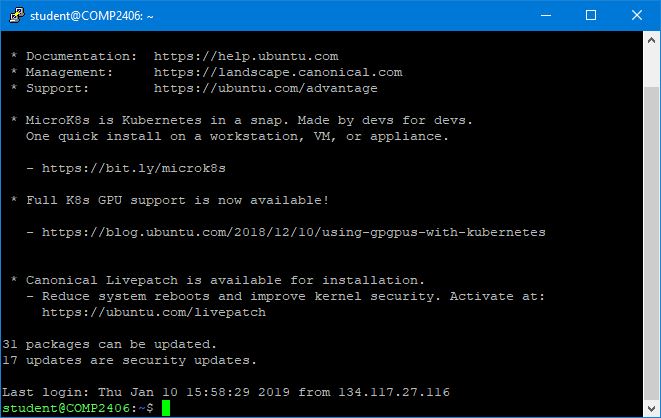
You now have full access to manage the server, install software, and perform administrative tasks.