Cloudflare provides an easy way to enable SSL for your website by proxying traffic through its servers. This not only secures connections with SSL but also gives access to additional Cloudflare features such as DDoS protection and website performance optimization.
Below is a step-by-step guide to setting up a free SSL certificate with Cloudflare, with important clarifications regarding SSL modes.
Prerequisites
Before you begin, make sure all of the following conditions are met:
-
you have purchased a domain name for your website;
-
you have access to DNS management at your domain registrar;
-
you have chosen a hosting provider and uploaded your website to the server;
-
your website is already accessible on the internet.
Step-by-step instructions
1. Create a Cloudflare account
If you do not already have a Cloudflare account, create one first.
Go to the Cloudflare website, register at dash.cloudflare.com, and sign in to the Cloudflare dashboard.
2. Add your website to Cloudflare
-
After logging in to the Cloudflare dashboard, click Add site or Add a domain.
-
Enter your domain name (for example, example.com) and click Add site.
-
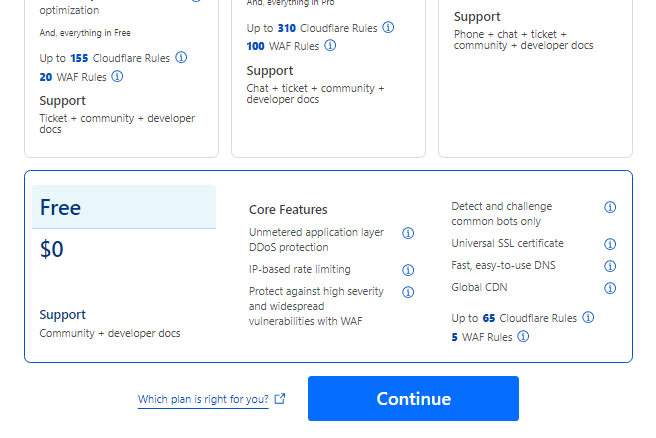
Choose a plan. You can safely select the Free plan, which includes basic protection and a free SSL certificate:
-
Wait while Cloudflare automatically scans your existing DNS records. This usually takes less than one minute.
-
After the scan is complete, go to DNS → Records and note the two Cloudflare name servers displayed at the bottom of the page. They will look like name1.ns.cloudflare.com and name2.ns.cloudflare.com.
3. Find your hosting server IP address
You will need the IP address of the server where your website is hosted. You can usually find it:
-
in your hosting provider’s control panel;
-
in the welcome email sent after hosting activation;
-
by contacting your hosting provider’s support team.
4. Configure DNS records in the Cloudflare dashboard
Now you need to point your domain to your hosting server via Cloudflare.
-
Log in to dash.cloudflare.com and open DNS → Records.
-
Under DNS management for example.com, make sure there are no existing DNS records. If any are present, remove them by clicking Edit and then deleting the record.
-
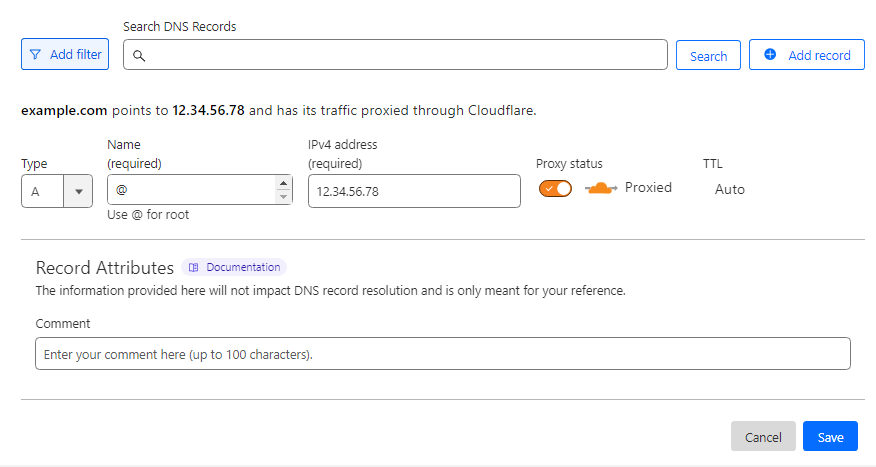
Click Add record and fill in the fields as follows:
• Type — select A;
• Name (required) — enter @;
• IPv4 address (required) — enter your hosting server’s IP address;
• Proxy status — make sure the toggle is enabled (orange cloud icon):
-
Click Save to apply the changes.
5. Enable SSL in Cloudflare
Once Cloudflare starts managing your domain, you can configure SSL encryption.
-
Open SSL/TLS → Overview in the Cloudflare dashboard.
-
In the SSL/TLS encryption section, click Configure.
-
Select the Flexible mode and Save the changes:
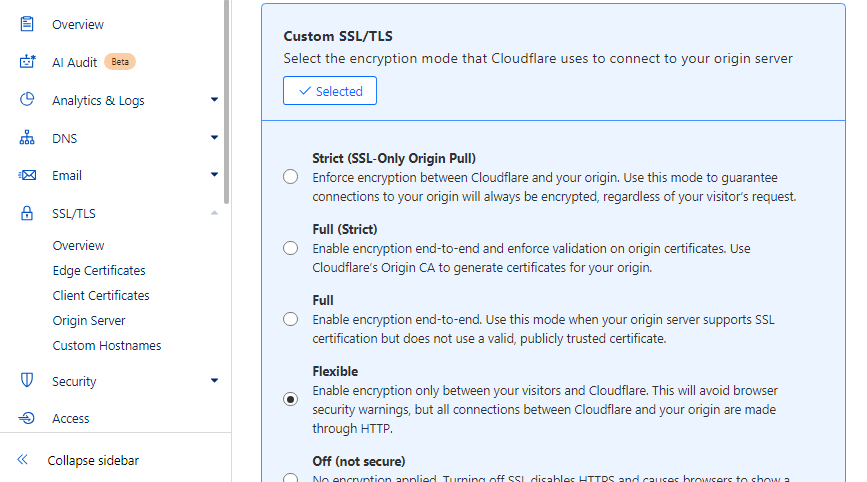
The Flexible mode encrypts traffic only between the visitor and Cloudflare, while the connection between Cloudflare and your hosting server remains unencrypted.
If your hosting provider supports SSL certificates (including self-signed or Let’s Encrypt certificates), you can choose Full or Full (strict) for better security.
6. Update name servers at your domain registrar
To allow Cloudflare to control your website traffic, you must update the name servers at your domain registrar.
-
Log in to your registrar’s control panel.
-
Find the section for managing name servers (usually called Name Servers, DNS, or similar).
-
Replace the existing name servers with the two Cloudflare name servers you received earlier (for example, name1.ns.cloudflare.com and name2.ns.cloudflare.com).
DNS propagation can take anywhere from a few minutes up to 48 hours, depending on the registrar.
7. Enable automatic HTTPS redirection
To ensure all visitors use the secure version of your site:
-
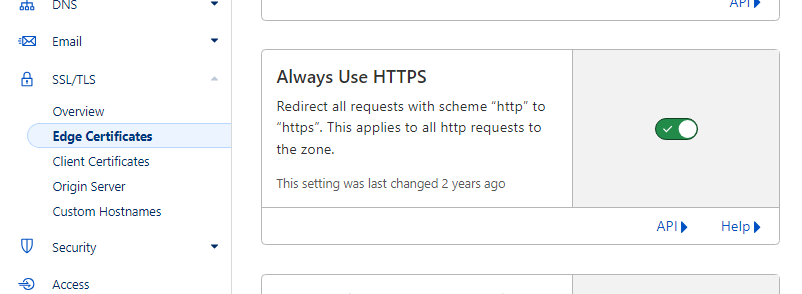
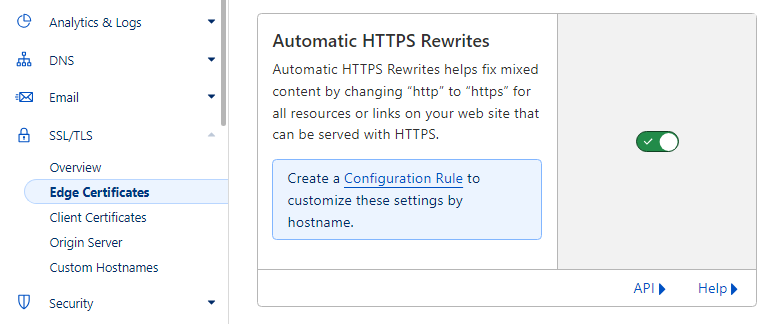
Go to SSL/TLS → Edge Certificates in the Cloudflare dashboard.
-
Enable the Always Use HTTPS toggle:
-
On the same page, enable Automatic HTTPS Rewrites:
Done
After these steps are completed and DNS changes have fully propagated, your website will automatically open using the secure HTTPS protocol in all modern browsers.